Are you doing image SEO? If not, you’re missing out on a big opportunity to bring more traffic to your website.
This guide will talk about how to optimize your media for maximum search engine visibility.
It will cover everything from the file name and alt text to size and compression, including the tools suggested.
Contents:
What is Image SEO?
It is optimizing your images to increase rankings and visibility in SERPs.
It can be done by tweaking the file name, alt text, title tag, and other elements.
 With this process, you’re making it easier for search engines to find and index your images, which can lead to more traffic to your website.
It also helps increase user experience by providing relevant media within your content.
But wait – there’s more.
In addition, it improves accessibility for those who are visually impaired and are using screen readers.
And by offering a proper alternative text, you can tell these users what your pages are about.
Why Is Images SEO Important?
Take a look at the following statistics.
People use Lens to answer 8 billion questions every month.
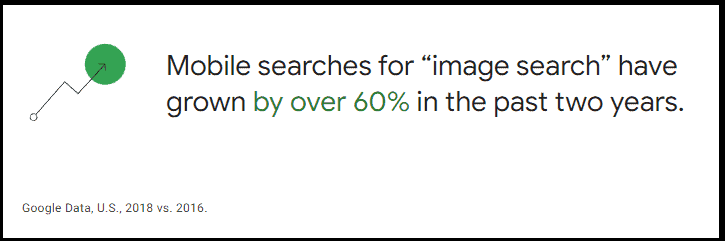
Mobile searches for “image search” have grown by over 60% in the past two years.
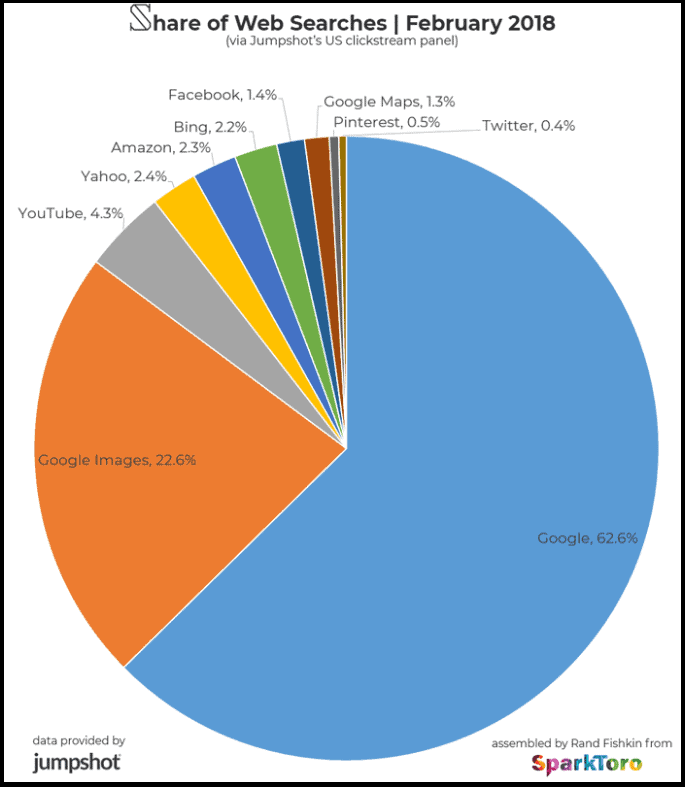
In 2018, Google Images was responsible for 22.6% of all web searches.
In 2019, one billion people used Google Lens for visual searches.
And at this rate, numbers are only going to increase.
So, why don’t you jump on the train and optimize your images for search engines?
Image SEO Pillars
Take a look at these SEO pillars:
- Quality and resolution
- Accessibility
- Context
- Uniqueness
- Loading time
Quality and Resolution
Having good quality and resolution helps ensure that the pictures on your site are clear and easy to see.
It’s also important to make sure that they are the right size. If they are too large, they will take longer to load, impacting your website’s ranking.
On the other hand, if they are too small, they may not be clear or visible on all devices.
To find the perfect balance, you need to consider the file size, dimensions, and format.
Accessibility
Your images need to be accessible to everyone, including those who are visually impaired or using screen readers.
To do this, you need to provide alternative text, which should describe its contents.
By writing it, you’re making it possible for everyone to understand what is on your website.
Context
Your pictures need to be relevant to the topic of your content. They should also be placed in the right location.
For example, if you’re writing a blog post about dogs, you wouldn’t want to place a photo of a koala in the middle of your content.
Not only would this be irrelevant, but it would also be confusing for your readers.
So, when choosing the right media for your content, make sure they are relevant and placed in the right location.
Uniqueness
Your content needs to be original, and so do your images.
To ensure they are unique, you can use Google’s reverse image search tool. This tool will help you find duplicates on the internet.
If you find that your media is being used by someone else, you can reach out to them and ask them to remove it (or give proper credit).
Loading Time
The final thing you need to consider is loading time.
Your images need to load quickly. If they take too long to display, it will impact your website’s ranking.
To ensure a good loading speed, you need to make sure they are in the right size and format.
Also, you should choose a fast and reliable hosting service.
How to Optimize Images For Your Website
By following these points, you can help improve your content visibility in search results:
File Name
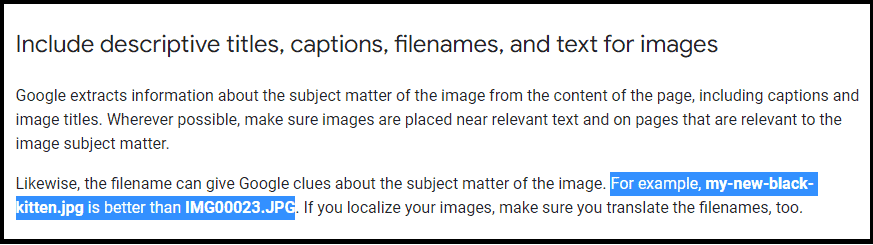
The file name should be descriptive and reflect the contents of your image.
For example, if you have a photo of a dog, you should pick something like “dog.jpg” or “dog-1.jpg.”
By using a descriptive file name, you’re making it easier for search engines to understand what your image is about.
Avoid using generic file names like “IMG0001.jpg” or “image1.jpg”. They provide no information about the content.
Not only that, but they also make it more difficult for search engines to index your photos.
 Remember, context is key. You want to make sure that your media are placed in the right location.
For example, if you’re writing a blog post about canonical tags, you wouldn’t want to place a picture of a cat in the middle of your content (unless it is just for laughing).
Not only would this be irrelevant, but it would also be confusing for your readers.
Also, whenever it’s possible, include your keyword in the file name.
So, if you’re writing a blog post about “Google Search Essentials,” you could use a file name like “SEO-guidelines-from-Google.jpg.”
Alt Text
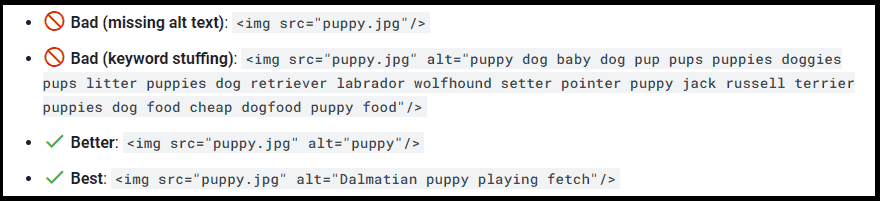
The next thing you need to do is add the alt text (alternative text).
It’s a short description of your image. It is used by search engines to understand its contents (it is also beneficial for visually impaired people).
Optimizing it is part of a good on-page SEO strategy. If a photo on your site fails to load for any reason, the user will be able to understand it anyway, thanks to it.
 When writing your alt text, make sure it is descriptive and includes your target keyword (you can check your image information with the Moz Chrome extension).
For example, if you’re writing a blog post about “HTTP status codes“, you could use this alt text like “Example of most common HTTP status codes”.
Be sure to avoid filling it with too many keywords (keyword stuffing). This will not only hurt your rankings but also annoy your visitors.
However, not all images need alt text. Refer to this W3 article, to guide you to the right decision.
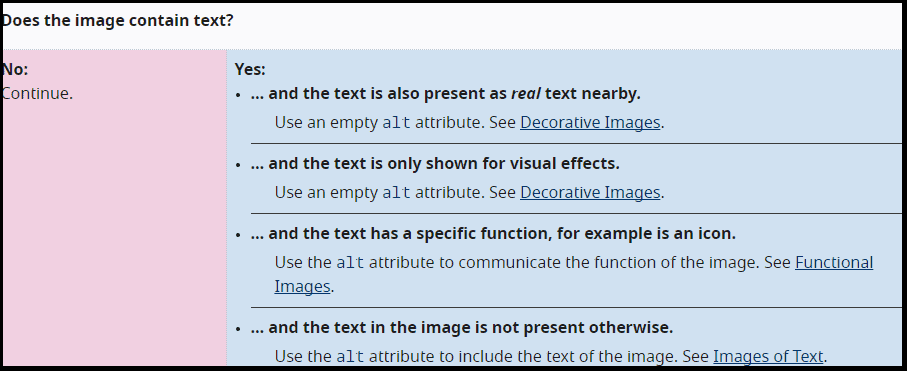
Remember: if a photo is used for decorative purposes only, then you don’t need to include additional information.
Caption
Captions under images are read on average 300% more than the body copy itself, so not using them, or not using them correctly, means missing out on an opportunity to engage a huge number of potential readers.
Image captions are the text that appears below your photo.
Although they may not directly influence SEO, they provide additional information about the content.
When writing one, make sure it is relevant and includes your keyword.
As a general rule, put yourself in the shoes of your readers.
Often, people scan the content page, checking just headings, images, and captions.
So, anything that could enhance the user experience should be taken into consideration and applied in your content marketing strategy.
Format
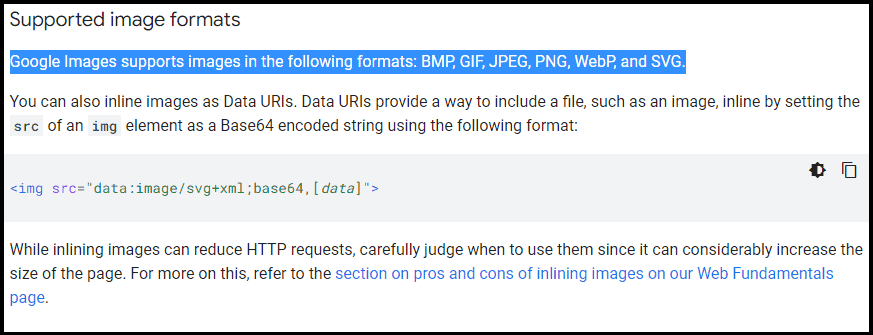
The most common formats are JPG, PNG, and GIF.
JPEG (Joint Photographic Experts Group) is the best format for pictures that will be displayed on the web. JPEGs have a smaller file size than other types of images, which means they will load faster on your website.
PNG (Portable Network Graphics) is good for transparent backgrounds, such as logos.
GIF (Graphics Interchange Format) is great for images that are simple, such as line drawings with fewer colors.
When choosing, make sure to consider file size and quality.
And if you have different picture formats, be sure to check if Google can read them.
Compression
HTTP Archive states that
images, on average, influence more than 20% of the webpage’s total weight.
What does it mean for you?
It means that you should compress your pictures, before uploading them to your website.
However, it’s important to note that not all image compression is created equal.
Lossy compression, for example, reduces the file size by discarding some of the data. This can result in a lower-quality media.
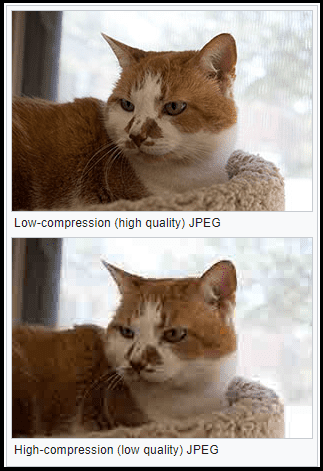
Lossless compression, on the other hand, compresses your photo without losing any data. This means that the quality will not be affected.
In case you might be asking yourself, there are many different ways to compress your media. You can use an online tool like TinyPNG or Kraken.io.
Or, if you’re using WordPress, you can install a plugin like WP Smush or ShortPixel.
Remember. Everything should be focused on improving user experience, so make sure to test different options and see what works best for you and your website.
Once you have a live page, be sure to check its loading time with PageSpeed Insights by Google. This will help you identify any areas where you can improve your page’s score.
Mobile-Friendly
Google won’t index sites that do not work on mobile devices after July 5, 2024.
So, it’s essential to make sure you optimize your images for mobile devices!
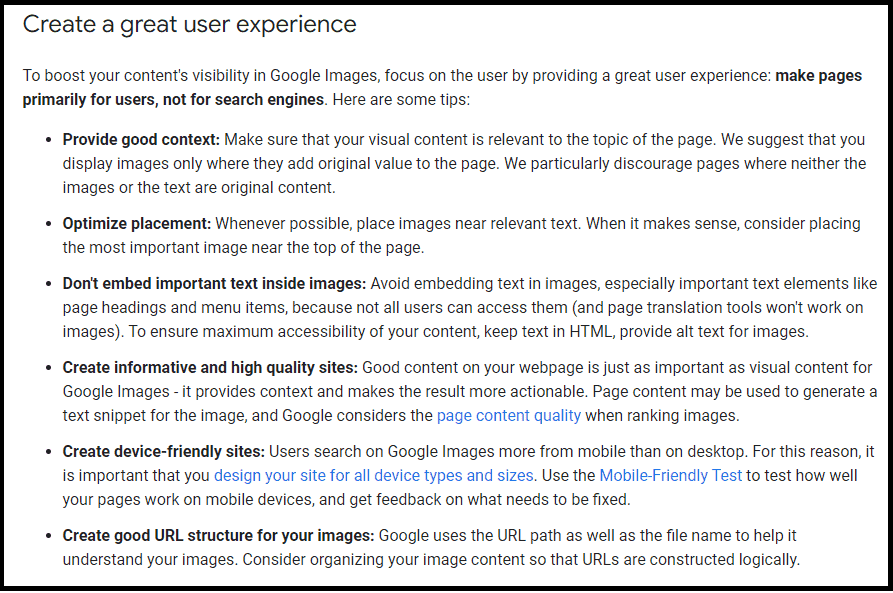
Google guides best practices, so you can create responsive media that look great on all devices.
Some key tips include:
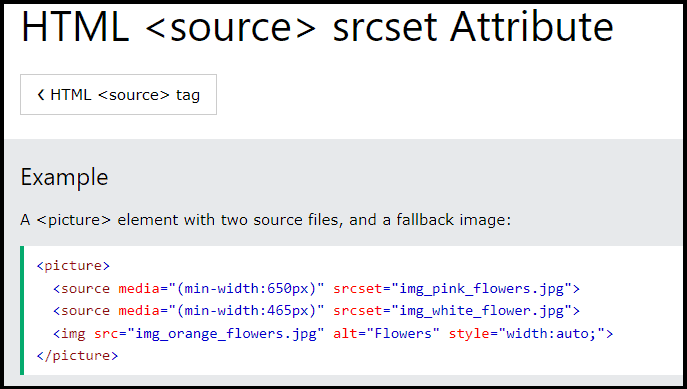
- Use the srcset attribute to specify different sizes for different devices.
- Use the sizes attribute to control how your photos are displayed on different screen sizes.
- Use the <picture> element to control which image is displayed on different devices.
Luckily, if you are using WordPress, there is a plugin that can help you with this called WP Smush.
It automatically detects when an image is being viewed on a mobile device and serves the appropriate size.
Also, specific responsive WordPress themes can be used to automatically adjust your site’s layout for different devices.
Sitemap
A sitemap is a file that contains a list of the pages on your website, including all the images, and it helps search engines crawl your new pages.
It can also be used to provide additional information about each page on your site, such as when it was last updated and how often it is changed.
You can create it manually or you can use a sitemap generator tool. Once you have created it, you need to submit it to Google Search Console.
If you’re using WordPress, there is a plugin called Yoast SEO that can help you with this. It automatically generates a sitemap for your website and submits it to GSC for you.
However, if you’re not using WordPress, you can find a list of sitemap generators here.
Uniqueness
To make sure your images are unique, avoid using stock photos whenever possible.

Instead, take your own photos or use online tools like Canva or PicMonkey.
Remember, when it comes to image quality, you need to make sure they are clear and sharp.
Avoid using blurry or low-resolution pictures, as these will not only look bad on your website, but they will also be less likely to rank well in search engines.
Advanced Image SEO Practices
Here are some advanced practices that you can use to take your image optimization to the next level:
- Structured Data
- Lazy Loading
- Browser Caching
- Content Delivery Network
- Social Sharing Buttons
- Open Graph and Twitter Cards
Structured Data
Structured data is a code that you can add to your website to help search engines understand your content. It’s sometimes also referred to as schema markup.
Adding it can help improve your online visibility by providing additional information about your images to search engines. This, in turn, can help increase your chances of appearing in image search results.
There are many different types of structured data that you can use.
Google Images supports the following types of content:
Product
An example of this would be:
<img itemprop=”image” src=”sample.jpg” alt=””>
This tells search engines that the photo is of a product.
You can also add additional information about the product, such as the price, name, and description.
Videos
For instance, this code tells search engines it is a video:
<video itemprop=”video” controls>
<source src=”sample.mp4″ type=”video/mp4″>
<source src=”sample.ogg” type=”video/ogg”>
</video>
You can also include more information about the video, such as the name, description, and thumbnail image.
Recipe
This code informs search engines that the picture is of a recipe:
<img itemprop=”image” src=”sample.jpg” alt=””>
You can also add additional information such as the name, description, and author.
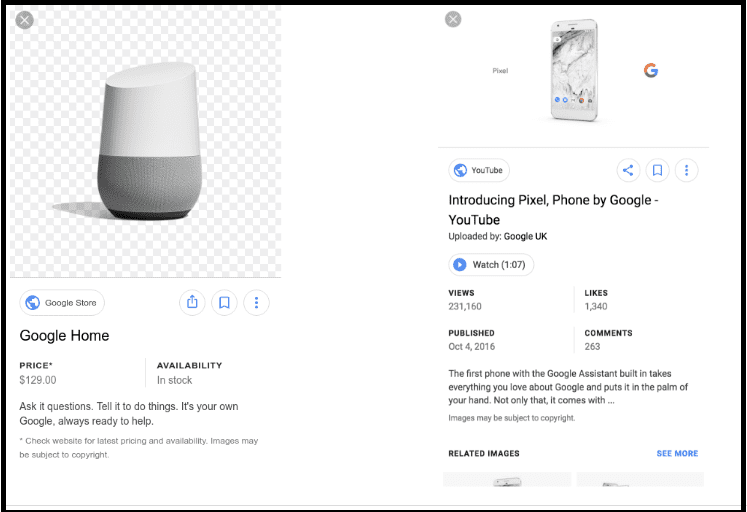
In essence, if you use structured data, Google Images can showcase your photos as rich results.
These include badges that tell users key information about your page, which could lead to more people going to your site who are interested in what you have to offer.
Like the below example:
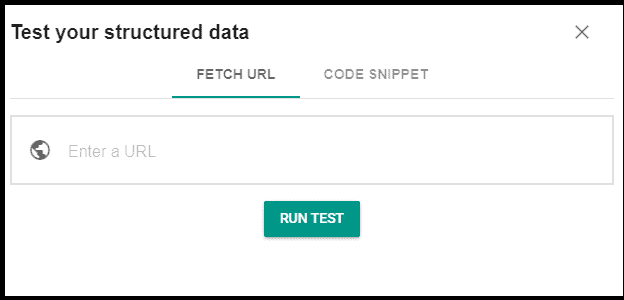
Now, if you’re looking to see what sorts of rich results could be generated for your page, the Google Rich Results Test is where you should begin.
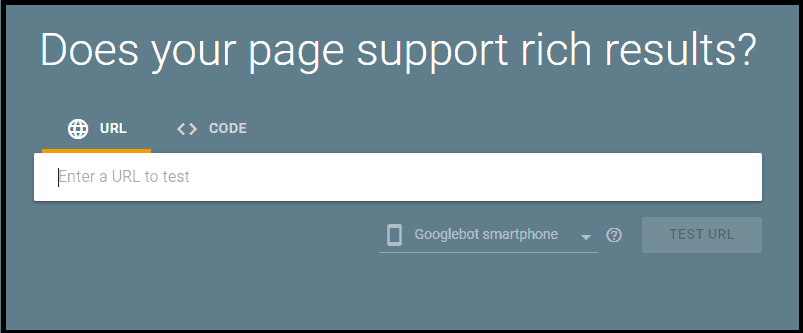
Then, for validation, use the Schema Markup Validator.
Lazy Loading
Lazy loading is a technique that delays the loading of images until they’re needed.
This means that any media below the fold (the part of the page that’s not visible without scrolling) is not loaded until the user scrolls down to them.
Here’s what Google stated about lazy loading:
Basically, this process can help improve your website’s performance, as it reduces the amount of data that needs to be loaded when a page first loads.
It can also help improve your SEO, as site speed is a ranking factor.
Google provides a guide on how to properly lazy-load content (which is critical for search robots to be able to view the content) here. There are different methods, but in each of them, you need to work with Javascript. If you are unfamiliar with it, you may need a coder to help you.
Luckily, if you’re using WordPress, there are many lazy-loading plugins that you can use. One example is the a3 Lazy Load.
But there are others, such as Smush, Image Optimization Lazy Load by Optimole, or Lazy Load by WP Rocket.
Browser Caching
With browser caching, the content is stored in the user’s browser, so the site loads faster when they visit the page in the future.
For example, when you visit a website for the first time, the browser needs to load all the files (including the pictures) from the server.
But if you visit the same website again, it can load some of the files (including images) from its cache. This means that the site will load faster, as the browser doesn’t need to fetch all the files from the server.
Here’s Google’s point of view on this:
So, how do you set up browser caching?
To do it manually, you need to add code to your .htaccess file.
Here’s an example of the code you would need:
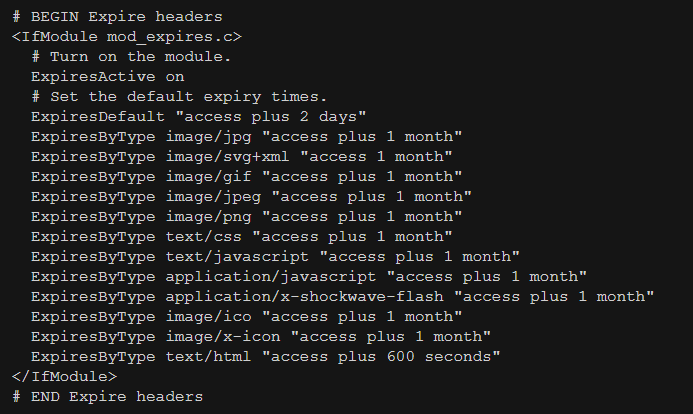
If you are not comfortable editing the .htaccess file, you can use a plugin, such as W3 Total Cache or WP Rocket.
You can also use a dedicated hosting provider, which will provide caching as an included feature (for example, WPEngine).
Content Delivery Network
A CDN is a network of servers that delivers content to users based on their geographic location.
For example, if someone in the UK visits a website, they will be served content from a server in the UK.
But if someone in Australia visits the same site, they will be served content from a server in Australia.
This can help improve your page’s speed (as the content is delivered from a server that’s close to the user).
If you want to use this service, there are many options available (some of the most popular ones are Cloudflare, StackPath, and Amazon CloudFront).
Social Sharing Buttons
Social media is a great way to promote your content and get more traffic to your website.
When you add social sharing buttons to your images, it makes it easy for people to share them on social media.
And the more people that share your content, the more traffic you’re likely to get.
There are many social sharing plugins that you can use. I use Social Warfare and it looks great!
Also, if you’re worried about people stealing your images, you can watermark them.
A watermark is a text or logo that’s added to an image. It’s usually transparent, so it doesn’t interfere with the visual.
It can also help deter people from stealing your work, as it’s easy to see who the owner is.
And if someone does share your images without giving you credit, you can easily contact them and ask them to add the proper link source.
There are many plugins to help you with this. One example is the WP Image Watermark.
Open Graph and Twitter Cards
Open Graph and Twitter Cards are snippets of code that you can add to your website.
They help social media platforms (such as Facebook and Twitter) understand your content, so they can display it properly when it’s shared on social media.
For example, if you share a link to your website on Facebook, Open Graph will tell Facebook what image to display.
So, without Open Graph, Facebook would just display a random image from your website.
Here’s what Twitter Cards look like on HTML:
You can add this information to your website using a plugin, such as Yoast SEO.
Once you have installed the plugin, you can check with each of these validator tools to make sure that your code is correct:
- Twitter Card validator
- Facebook Sharing Debugger
- LinkedIn Post Inspector
- Pinterest Rich Pins Validator
Image SEO Online Tools
Using the right tools can also help you with image SEO.
Here are some of the best ones.
TinyPNG
TinyPNG is a free online tool that helps you compress your media.
To use it, simply upload your files and then download the compressed versions.
ImageOptim
ImageOptim is a free app for Mac, but it can also be used online, by anyone upon registration.
It offers lossless compression (available as both a paid app and a free online tool).
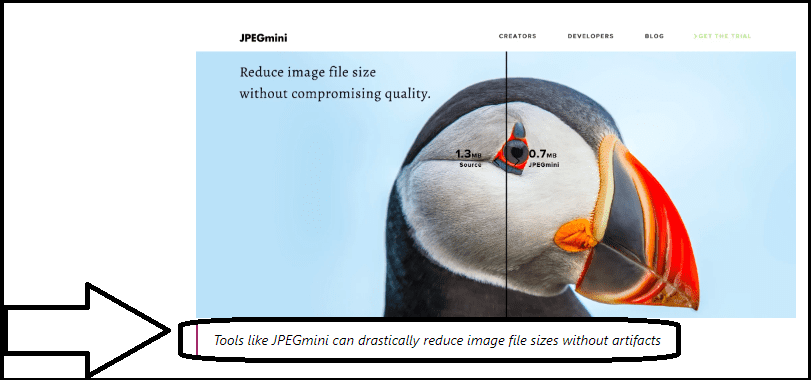
JPEGmini
JPEGmini is a paid service that helps you with compression.
It’s similar to TinyPNG, in that it reduces the file size of your images without reducing the quality.
Before You Go
Thanks for reading so far, and congratulations on taking a step further in optimizing your content!
But wait. There’s much more you can do.
Take a moment to read this guide:
Now, it’s over to you.
Is there any other tip you want to add about image SEO?
Please share it in the comments below!
Hello, Erik,
This a detailed post. Images speak a thousand words and they also help in SEO as well. Using captions and alt text helps search engines to crawl and understand your images. It also helps in SEO as well. Thanks for sharing this detailed post
Regards,
Vishwajeet Kumar
I’m glad you liked this image SEO guide, Vishwajeet.
Thanks for your comment!
I just started optimizing my images for SEO. Along with alt tags, I also use the tooltip to display a particular keyword term whenever someone hovers over my image.
Anything that can enhance user experience can help improve your overall SEO.
It’s all about our audience.
Thanks for reading and commenting, Randall.
good article and will bee helpful for seo I believe. thank you.
Good to have you helped, Mehmet.
Wow! It’s a long read but it was worth it and full of interesting information. Thanks for writing this wonderful piece. I’m definitely going to come back to read it allover again.
I have gained a lot of traffic via image search and I have learnt a couple of things to add to existing knowledge. Thanks
Hi Allen,
it really took me lots of hours to put this piece together.
I’m really happy to hear you learned something new here and that you enjoyed the reading.
Thanks for the great feedback!
Nice breakdown here Erik. I need to get back into this image optimizing bit because I drove some travel blog traffic through images I tagged properly from my globe trotting exploits. This works well with long tail keywords or lesser competitive travel spots. Keep up the good blogging work brother.
I think that count even more for specific blog niche like travel, where images count more than thousands of words.
Thanks for reading and leaving your nice feedback, Ryan. 🙂